Home
/ How To Draw A Cute Wolf Face - See full list on easydrawingtips.com
How To Draw A Cute Wolf Face - See full list on easydrawingtips.com
How To Draw A Cute Wolf Face - See full list on easydrawingtips.com. The pupils leave the reflections and the bottom parts of the the irises white. See full list on easydrawingtips.com Hi friends, let's draw a cute wolf with me today. Draw them with just a few curved lines around the bottom outer sides of the snout. See full list on easydrawingtips.com
Leave the main highlight area defined earlier white. For the nose shade as follows: For larger clumps or more complex clumps draw two longer lines with some shorter lines in between them. More images for how to draw a cute wolf face » These can pretty much be split into tree parts.
Medium Size Of Wolf Drawings Easy Cute Cool Drawing Cute Drawing Easy Wolf Hd Png Download Kindpng from p.kindpng.com See full list on easydrawingtips.com Leave the main highlight area defined earlier white. For larger clumps or more complex clumps draw two longer lines with some shorter lines in between them. Add another set of "wave like" lines along the snout to better define it's shape. Add the upper shape of the head with two sets of curves getting wider slightly past the horizontal line and then curving back inwards 3. Make the shapes ears somewhat similar to triangles and join the area between them with one curved line 5. See full list on easydrawingtips.com If drawing on paper it may be a good idea to use a pen or a marker starting from this stage of the drawing process.
Draw them with just a few curved lines around the bottom outer sides of the snout.
Add the upper shape of the head with two sets of curves getting wider slightly past the horizontal line and then curving back inwards 3. Draw the fur for the outer parts of the ears with very tiny strokes forming a set of very small fur clumps. How to draw a lynx face step by step These will be used later to help draw some of the wolf's fur patterns. You can also use the same line to help you make sure both eyes are on the same level. Draw them with just a few curved lines around the bottom outer sides of the snout. Though drawing the strokes for the fur can be quite time consuming you can end up with a much nicer looking drawing when you are done then if you were to draw with just simple outlines. The second is the areas at the bottom of the ears. See full list on easydrawingtips.com Add the fur below the ears in fairly small clumps that generally point to the sides and slightly upwards 3. Finally draw the nose (wider towards the top and narrower towards the bottom). Draw the lower shape of the head with a pair of angled lines that go from the ends of the curves and join at the bottom 4. Draw the fur at the top of the head (between the ears) fanning out upwards 2.
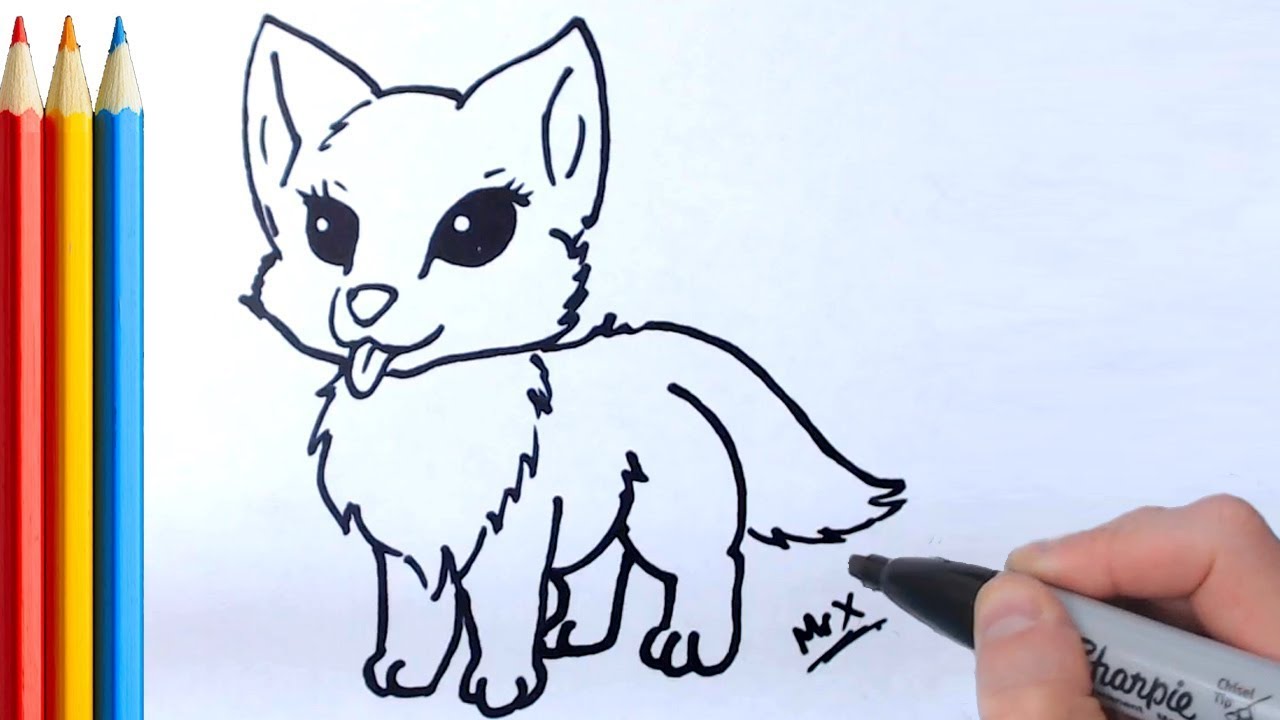
How to draw a lynx face step by step Position the eyes with their top end slightly overlapping the horizontal line from the the first step. Hi friends, let's draw a cute wolf with me today. Draw the fur as follows: How to draw an eagle head step by step 3.
How To Draw Wolf Simple Step By Step Tutorial Youtube from i.ytimg.com See full list on easydrawingtips.com One is the area at the top of the head between the ears. Make the shapes ears somewhat similar to triangles and join the area between them with one curved line 5. See full list on easydrawingtips.com Draw the fur at the top of the head (between the ears) fanning out upwards 2. It's simple!simply subscribe us for more drawing tutorial. The second is the areas at the bottom of the ears. See full list on easydrawingtips.com
The places where you want to add these lines will be the inner sides of the ears, the upper part of the snout, the mouth, and the bottom of the head.
Start the drawing by making a construction line sketch of the wolf's head to establish it's basic shape and proportions. The pupils leave the reflections and the bottom parts of the the irises white. See full list on easydrawingtips.com Generally these are fairly short and thin when compared to other animals such as cats. For larger clumps or more complex clumps draw two longer lines with some shorter lines in between them. The main areas of the eyes surrounding the irises 2. Leave the main highlight area defined earlier white. Draw the lower shape of the head with a pair of angled lines that go from the ends of the curves and join at the bottom 4. Add the fur below the ears in fairly small clumps that generally point to the sides and slightly upwards 3. How do you draw a wolf howling? Though drawing the strokes for the fur can be quite time consuming you can end up with a much nicer looking drawing when you are done then if you were to draw with just simple outlines. At this stage draw the mouth with just two straight angled lines from the bottom part of the snout curve towards the nose (but not touching the nose). One is the area at the top of the head between the ears.
The places where you want to add these lines will be the inner sides of the ears, the upper part of the snout, the mouth, and the bottom of the head. Alternatively you can also lighter the entire line with an erase to the point where it's barely visible so that you can keep it in the final drawing. Add the upper shape of the head with two sets of curves getting wider slightly past the horizontal line and then curving back inwards 3. The pupils leave the reflections and the bottom parts of the the irises white. If you've been drawing with pencil and feel you still need to clean up/lighten some of the construction lines it may be a good idea to use a kneaded that you can mod into various shapes and use it to get in between the fur clumps.
1 from The main areas of the eyes surrounding the irises 2. It's simple!simply subscribe us for more drawing tutorial. For the eyes shade the following areas: The second is the areas at the bottom of the ears. Add the fur below the ears in fairly small clumps that generally point to the sides and slightly upwards 3. How to draw an eagle head step by step 3. One is the area at the top of the head between the ears. See full list on easydrawingtips.com
Now refine the shape of the face by replacing some of the straight construction lines with more organic curves that better define the shape of the wolf's head.
Add the upper shape of the head with two sets of curves getting wider slightly past the horizontal line and then curving back inwards 3. The rest is going down from the bottom of the ears and meeting at the bottom of the face. It's simple!simply subscribe us for more drawing tutorial. Draw the fur for the outer parts of the ears with very tiny strokes forming a set of very small fur clumps. How to draw lion face & head step by step 2. Draw half circle (bottom of snout) that that with it's open end connects to the angled lines from the previous step and from these connection points draw two curves going upwards to define the shape of the snout w. For this step add some fur patterns for the inner part of the wolf's face. Have an epic moment in apex legends? You can also leave a tiny white highlight line in the middle to show the s. The second is the areas at the bottom of the ears. See full list on easydrawingtips.com How to draw an eagle head step by step 3. How to draw a wolf step by step?
You can also use the same line to help you make sure both eyes are on the same level how to draw a cute wolf. Just be sure to wait for the pen/marker to dry before erasing so you don't smudge it.